Touchscreens are a extremely useful quality of life upgrade for your Klipper enabled 3D printer. Not only they provide intuitive and convenient 3D printer controls to your fingertip, but they also make any 3D printer look cool and modern! Many of LDO kits now come standard with touchscreen panels - this article provides some basic instructions for setting up your touchscreen.
¶ Hardware Setup
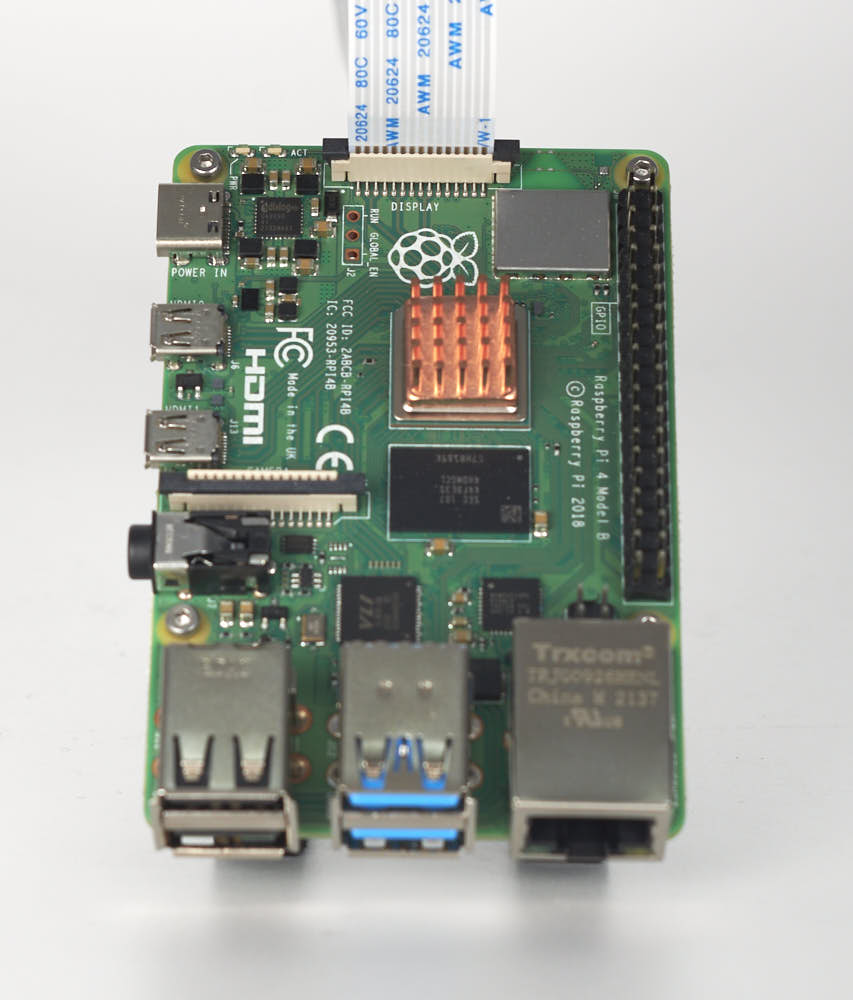
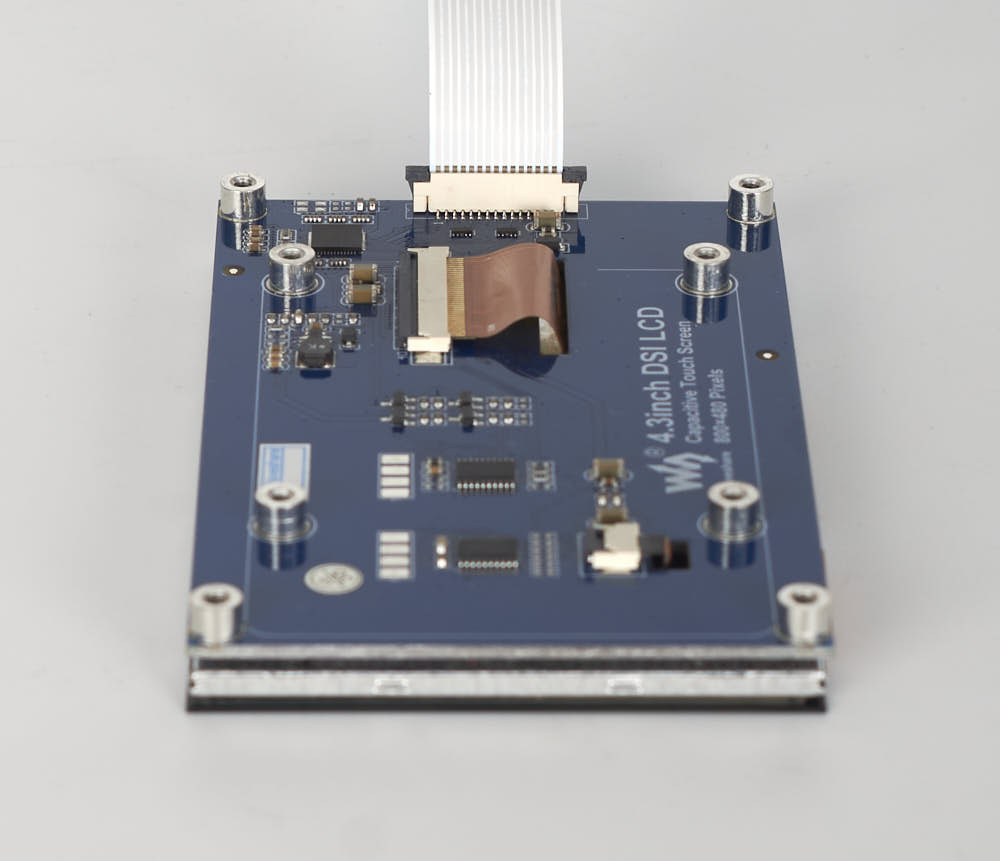
Your touchscreen will be controlled directly from your Raspberry Pi. Setting up the hardware is extremely easy. Simply use a FFC cable and plug one end to your Pi and the other to the touchscreen - that's it! The FFC cable provides both data and power to the screen.
¶ FFC Cable Orientation
Correct orientation of FFC cable is very important, since these ribbon cables have no polarity and can be plugged in from either side. Usually, the best way to identify the orientation is to look for the side that has metal contacts on the PCB connector. The metal contacts of the FFC cable should come in contact with the metal side of the PCB connector. Note that the flip side of the metal contacts is a blue tab.
Warning: Incorrect orientation of the FFC cables can result in damage to your Raspberry Pi and/or touchscreen.
Double check your work with the images below


¶ Software Setup
KlipperScreen is one of the most popular ways enable use of a touchscreen with Klipper. To use KlipperScreen, follow the setup instructions on its documentation site. No additional configurations are needed inside of Klipper's config files (e.g. printer.cfg). After successfully setting up KlipperScreen, you will find a new KlipperScreen.conf file accessible from your Mainsail or Fluidd interface. This file is used for making changes to KlipperScreen settings - for more details read this page.
¶ Rotating your touchscreen
You will may find that the screen is upside down depending on the physical orientation of the touchscreen. Follows these intructions to rotate your screen by 180 degrees.
- Power off your 3d printer.
- Remove the SD card from the Raspberry Pi
- Insert the SD card into your computer
- Manually edit
/boot/config.txtand make the following changes:
Try to find config.txt from boot section and open it using your text editor of choice (i.e. Notepad++, VS code, VIM, etc.).

If dtoverlay=vc4-fkms-v3d is found in config.txt, disable it by adding a hash (#) at the beginning of the line:
#dtoverlay=vc4-fkms-v3dThe last step is to copy and paste the following content to the end of file:
display_lcd_rotate=2
dtoverlay=rpi-ft5406,touchscreen-inverted-x=1,touchscreen-inverted-y=1After you are done, save and close the file.

Reinsert the SD card into your Raspberry Pi and reboot it.
¶ Before & After

