1. In this case, we assume that users have acquired the IP address of the printer by following Software Installation .if you have not, please do it before go on with our instruction.
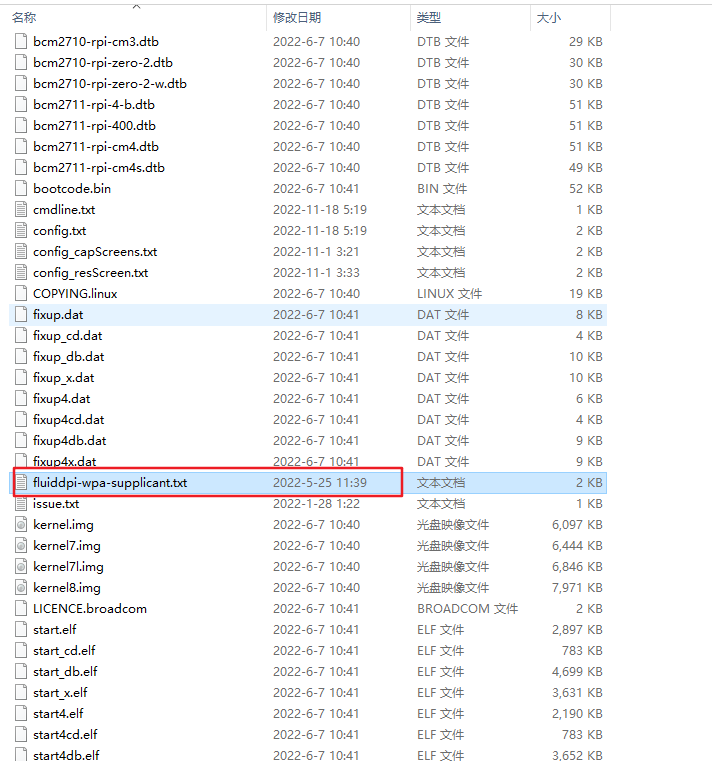
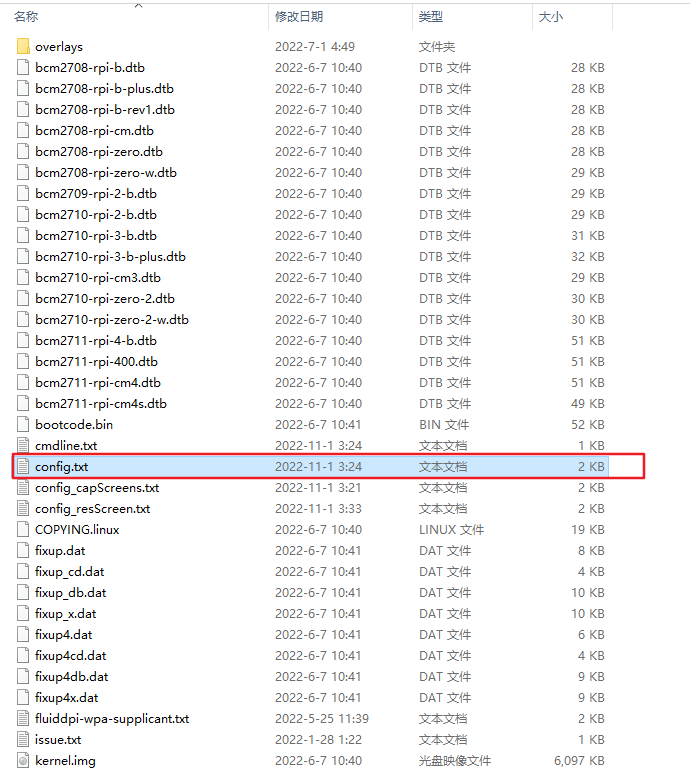
Insert the TF / SD card into a card reader and plug it into the USB port on your laptop. Find fluiddpi-wpa-supplicant.txt at boot section, and open it with Notepad++.
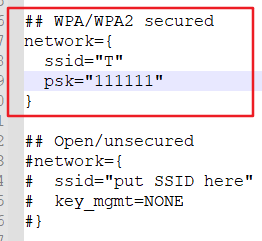
Now you are allowed to modify the WiFi information to your own.
Fill with the username of Wifi to to replace T from ssid=”T”, and the relative password to replace 111111from psk=”1111111”. Then save it.
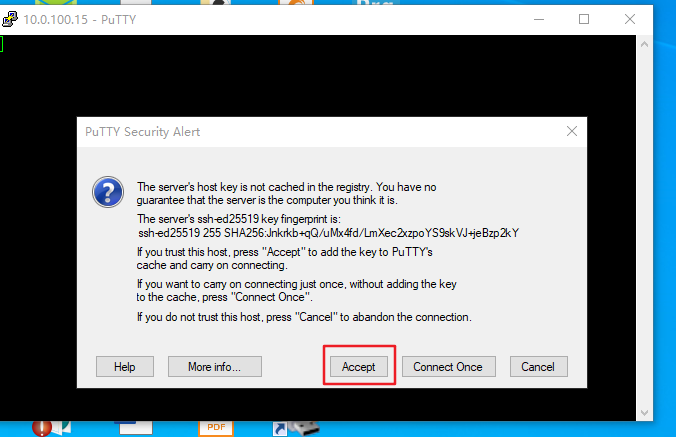
Download Putty if you don’t have one, and then fill with your own IP address of printer, mine is
10.0.100.15, as an example, then press Open, also Accept.

Log in with the default username pi and the password raspberry.

2. KlipperScreen Installation
Execute the following commands:
cd ~/
git clone https://github.com/jordanruthe/KlipperScreen.git
cd ~/KlipperScreen
./scripts/KlipperScreen-install.sh
Read More:Installation - KlipperScreen
3. To modify the config
Try to find config.txt from boot section and open with it by notepad++ after your laptop reading the TF/SD card.
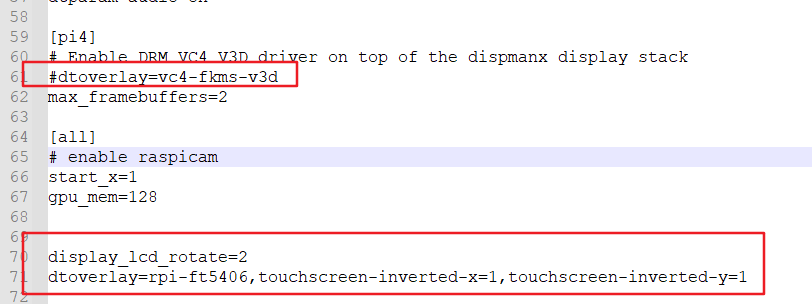
If dtoverlay=vc4-fkms-v3d is found in config.txt, please disable it in the following way:
#dtoverlay=vc4-fkms-v3d
The last step is to copy and paste the following content to the end of config, and save it before you close it.
display_lcd_rotate=2
dtoverlay=rpi-ft5406,touchscreen-inverted-x=1,touchscreen-inverted-y=1
Put the TF/SD card back to Pi and reboot it.
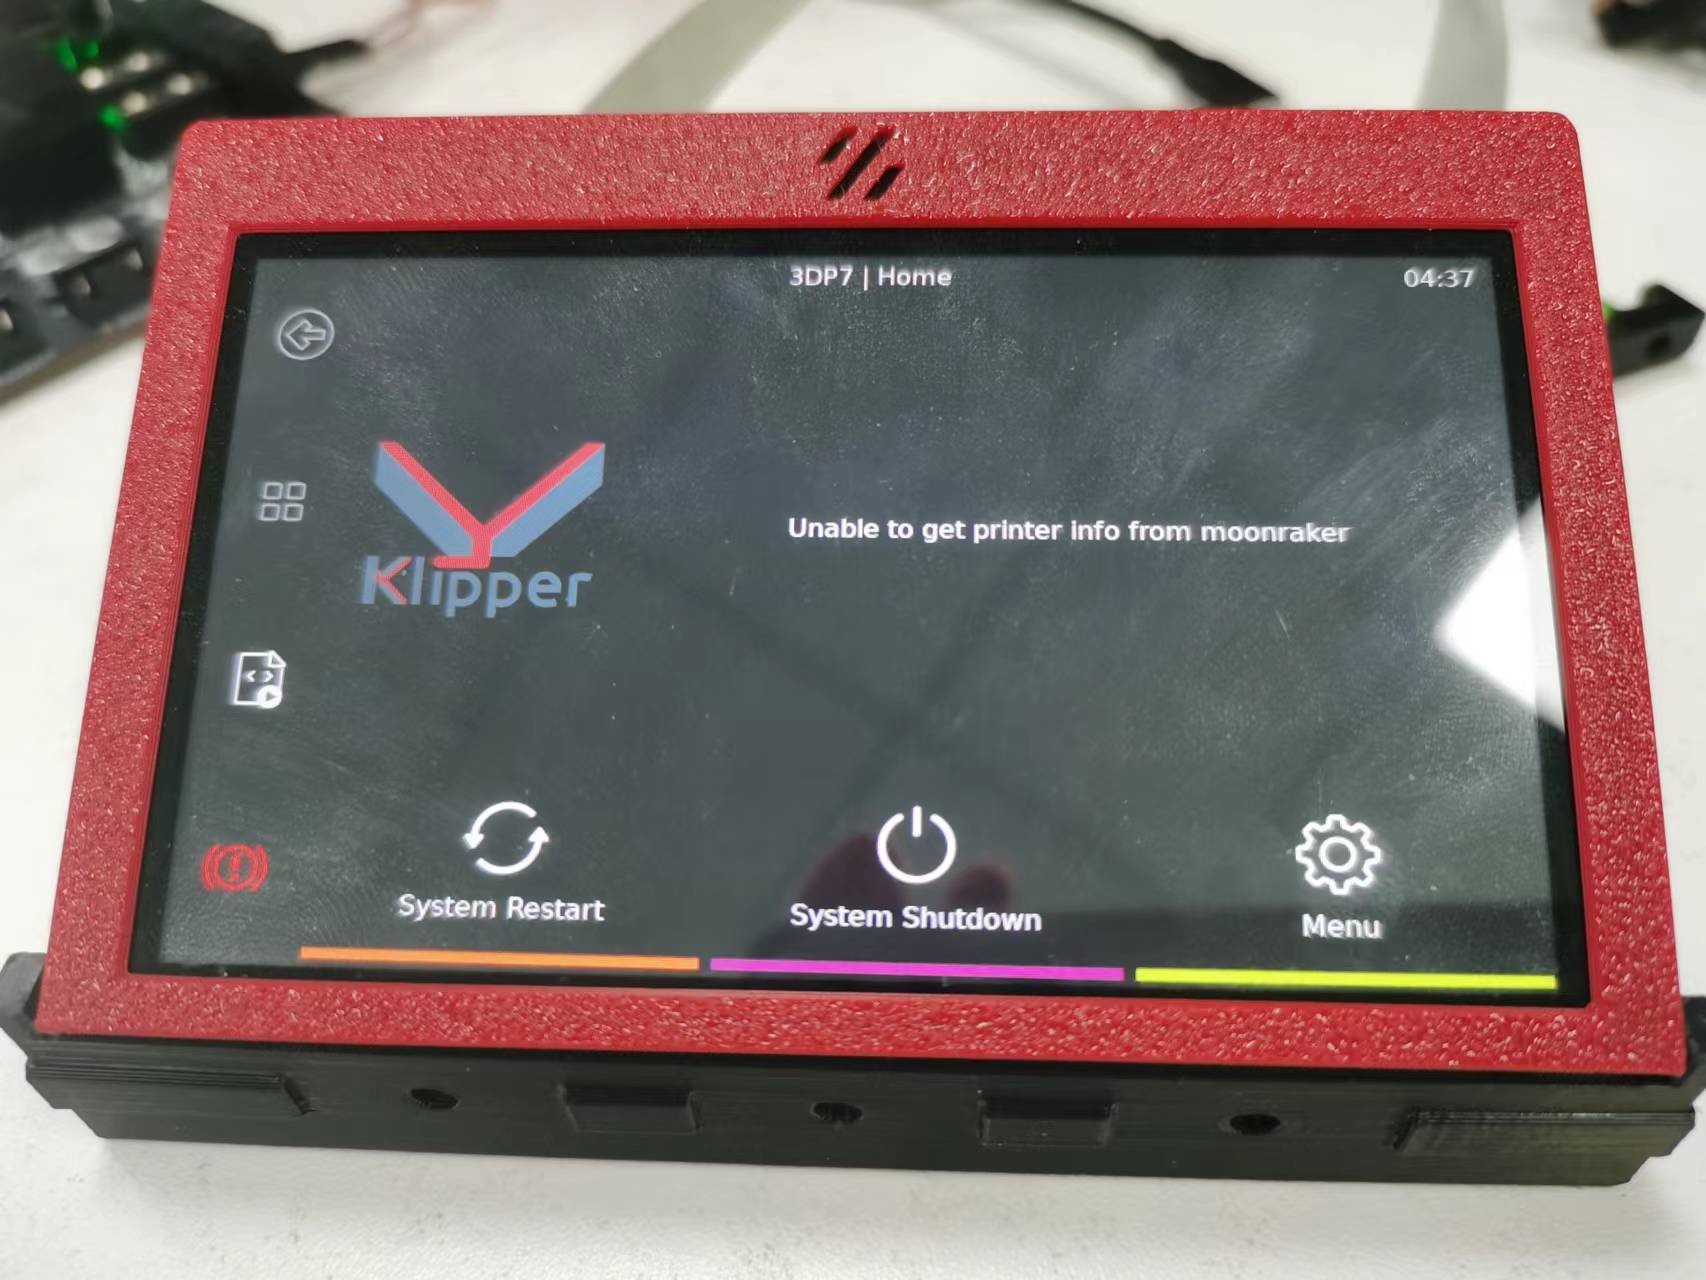
4. Before&After
Before:
After: