This guide is written to help you plan your Stealthchanger build. For newcomers to the Stealthchanger system, we recommend a thorough read through of this guide before starting any printing. The Stealthchanger system contains a huge number of variations and choices which are explained here, but a recommended build combo is detailed at the end of this guide.
¶ Calibration
Before starting any printing, fully calibrate your filament for shrinkage. This is critical to ensuring that the toolchanging mechanism fits smoothly. Read more here.
¶ Toolhead
While Stealthchanger is compatible with a huge range of toolheads, not options are created equal. Which toolheads you plan to put in your stealthchanger arguably has the biggest impact on the options available to you in the rest of the build. Let's take a look at what to consider when choosing toolheads:
- Size, the height, width, depth of your toolhead of choice has a big on influence on your build. Toolheads with narrow widths allow you to fit more toolheads in your Stealthchanger. Toolheads with a short height and slimmer depth allow you to use more compact docks (more on this later).
- Easy of docking is another important consideration. Usually due to the shape of the part fan cowling, some toolheads are more stable on their docks than others. This is important because the toolhead needs to dock and undock repeatedly and consistently from the same precise location in a multicolour print. The best toolheads for docking have magnets embedded in the cowling that attract to magnets in the docks.
To check if your toolhead of choice is supported by the Stealthchanger system, simply check if a backplate for it is available here.
¶ Modular Dock System
¶ Dock Variations
The Stealthchanger Modular Dock system consists of of a number of docks mounted of at the top-front protion of the printer. Each toolhead has its own dock which it rests upon when not in use. Docks come in several variations: Standard, Short, Stubby, Crabby.
- Standard, This is the standard dock that fits all toolheads. We recommend using this dock if this is your first Stealthchanger build.
- Short, Short docks are not as “tall” as standard docks and thus take up less vertical (Z axis) space. Certain taller toolheads are not compatible with short docks. Short docks also require your gantry to move to extremely high Z heights when docking/undocking; if done imporperly, this may take your Z MGN blocks off its rail. Use this type of dock with caution. To use short docks, print the short version of the front frame parts.
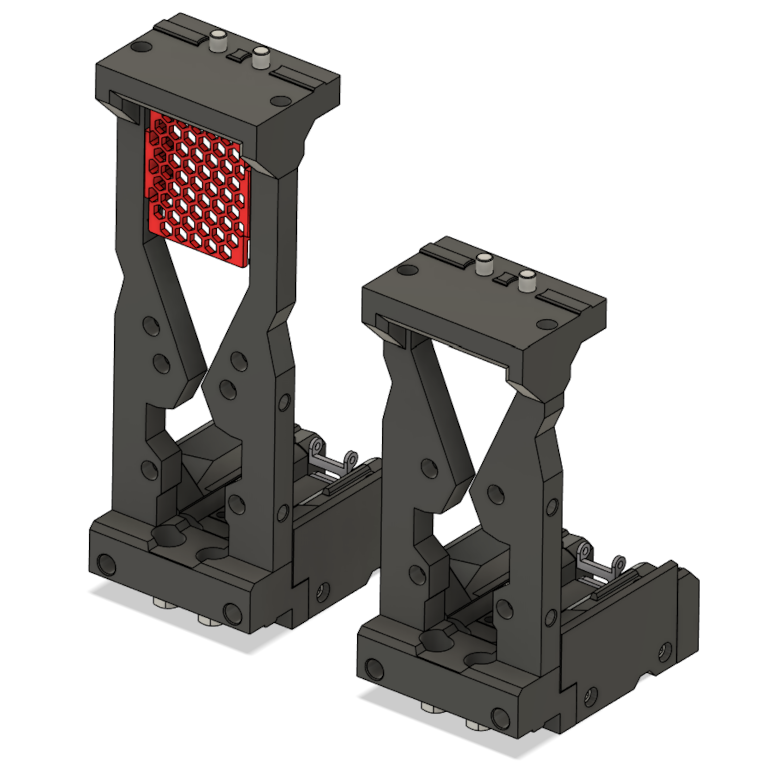
- Stubby, Stubby docks are not as long as standard docks and thus take up less depth (Y space). Certain larger toolheads are not compatible with stubby docks. Stubby docks cannot be used with Doorbuffer as its short depth prevents most shuttles from from reaching docked tools. To use stubby docks select the toolhead of choice in the Modular Dock STL directory and print the stubby base.
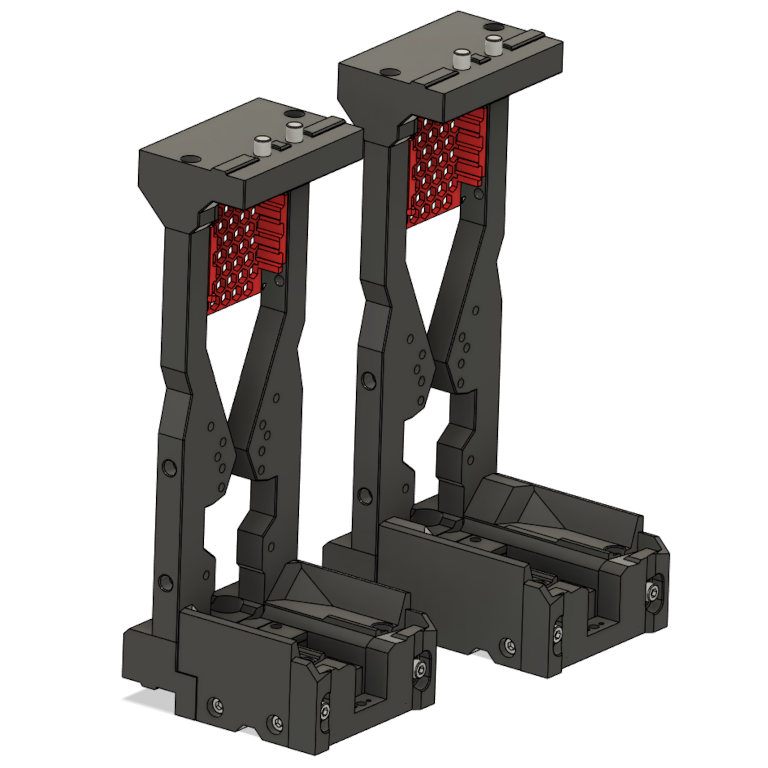
- Frameless (Crabby), Frameless docks omit the front frame of the dock entirely. This sacrifices the rigidity of the dock slightly but allows easy manual manipulation of the tools and saves some printing time. Frameless docks are not recommended for first time Stealthchanger builds.
Note that these dock variations are not mutually exclusive: a dock can be both short and stubby; you can also have a frameless stubby dock.
Also note that within the same printer, you cannot mix docks that are short with standard height docks, nor do should you mix standard docks with stubby docks.
¶ Nozzle Blockers
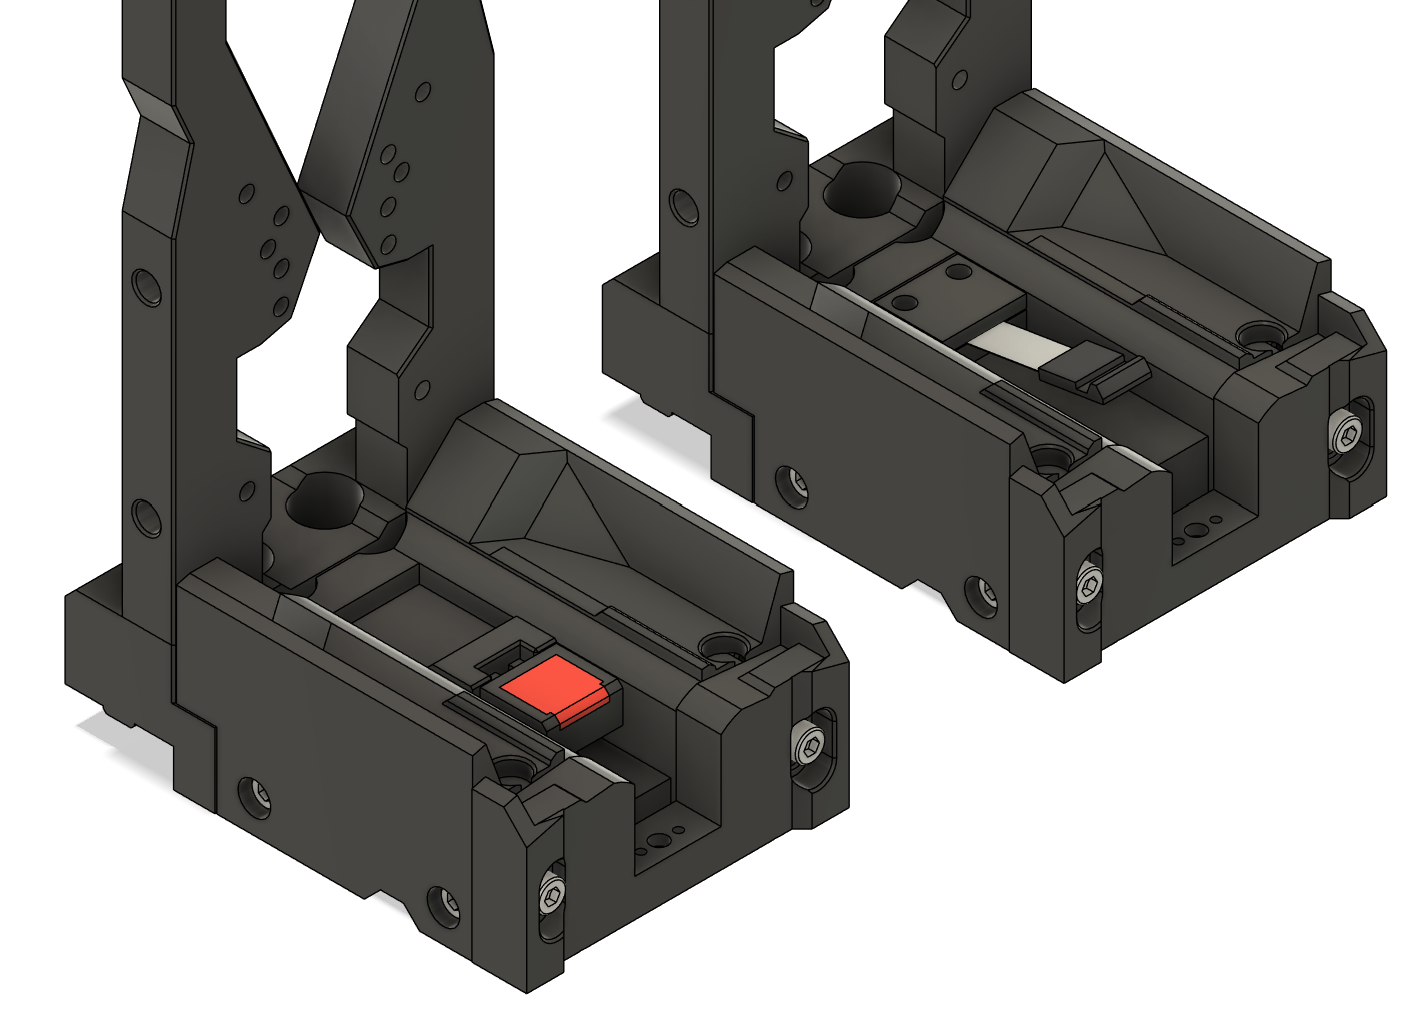
Nozzle Blocks are devices designed to combat filament ooze when the hotend is heated at its dock. There are two variations:
- Cup Blocker, this style consists of a silicone pad (that you mold yourself with RTV high temp silicone) that pushes against the hotend nozzle.
- Spring Steel Style, this style consists of a piece of spring steel with a silicone pad at the end which also pushes against the nozzle. The LDO toolhead kit includes a custom molded spring steel blocker.
¶ CrossBar and Doorbuffer
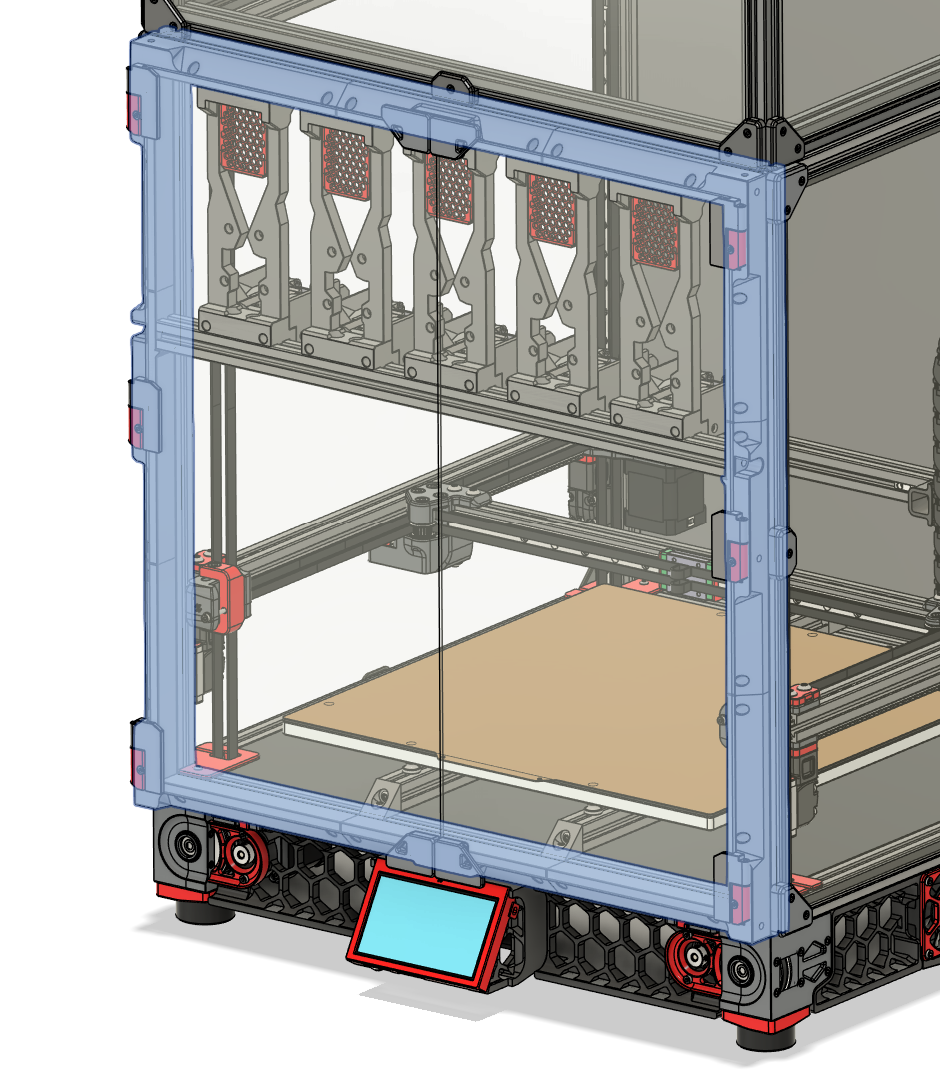
The crossbar is simply an horizontal extrusion that is used to mount all your docks. In general, there are two ways to install this crossbar to your printer frame:
- Flush with the front frame. In this configuration, the crossbar is installed flush with the front of the printer frame. This configuration is only possible if the front idlers on your gantry do not extend into the front extrusions such as in the case of mini BFI idlers.
- Door Buffer install. In this configuration, a Door Buffer printed frame and installed in front of the existing front frame of your printer. This extends the internal volume of the printer forward 20mm, and acts as the anchor point for the crossbar. This is the recommended method of mounting your crossbar - not only does it allow you to run the standard V2.4 front idlers (or other idlers and even AWD setups) but also frees up 20mm of Y print space that would be used up by the docks.
¶ Door Buffer variations
The Door Buffer is an entirely printed frame with a few variations available depending on the door you are using with your printer:
- Stock Door, If you are using the stock Voron2.4 door, simply print the stock Door Buffer.
- LDO kit Door, If you are using the LDO door for Voron2.4, print the LDO Door Buffer.
- Clicky-Clack Fridge Door, if you have a Clicky-Clack Fridge Door, print the Clicky-Clack Door Buffer.
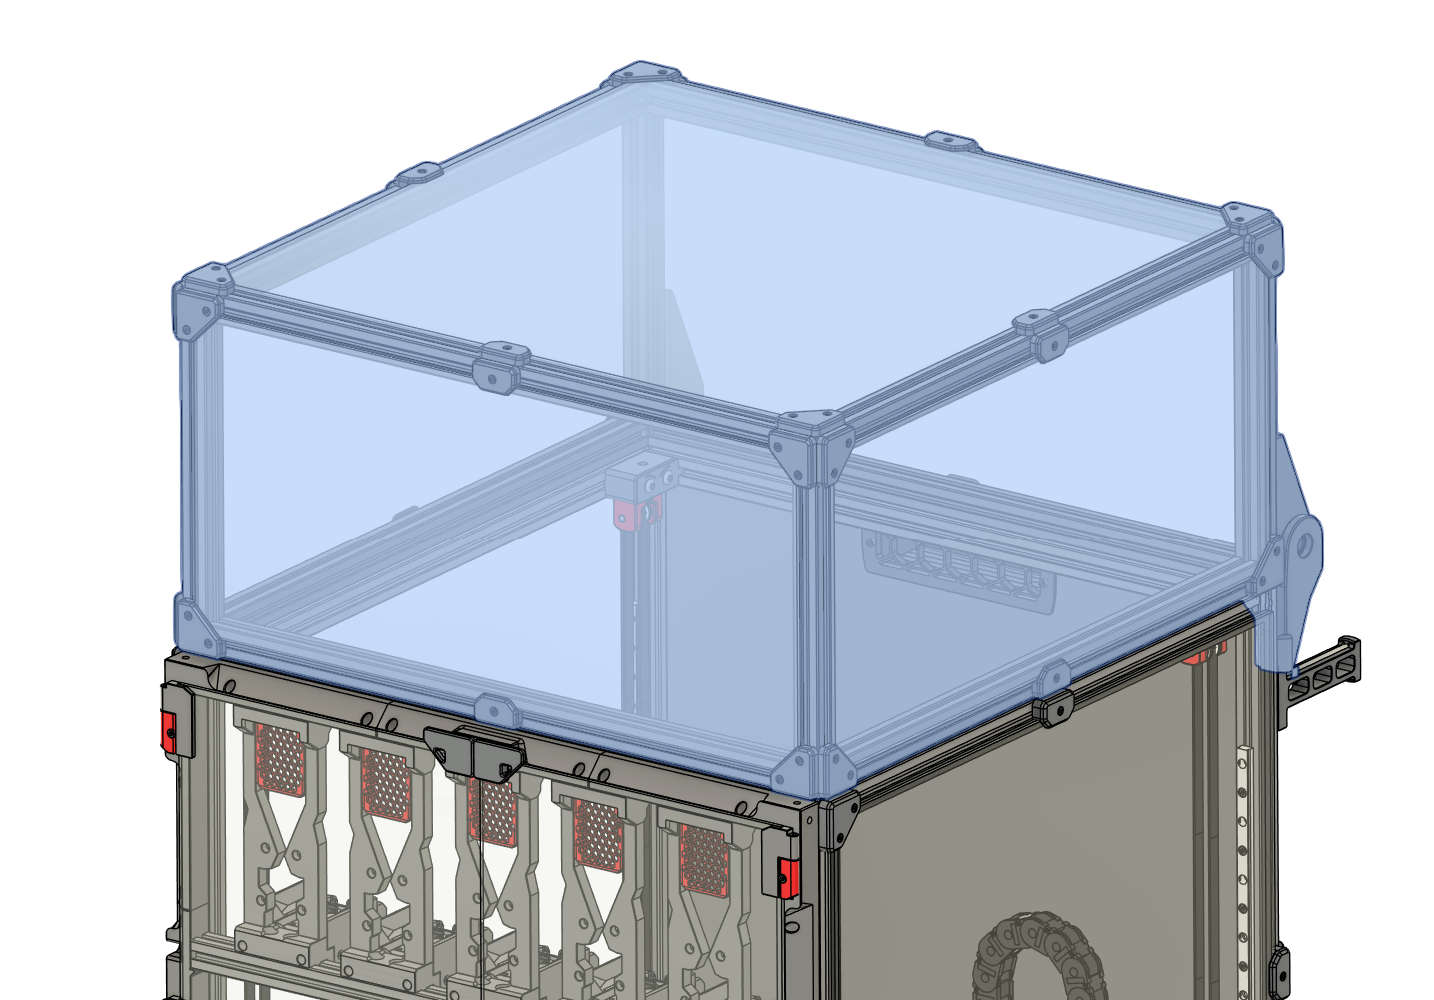
¶ Tophat
The Stealthchanger Tophat extends the height of your printer by several hundred millimeters. This extra internal space allows the numerous umbilicals of the docked tools to array neatly and prevents any tangling or cause docking failures. The LDO Frame kit includes parts to build the extrusion tophat. A printed rear hinge can be found here. The hinges use 625 bearings and M5x1mm spacers which are included in the kit. Use stock Voron panel clips or clips of your choice to secure the tophat panels.
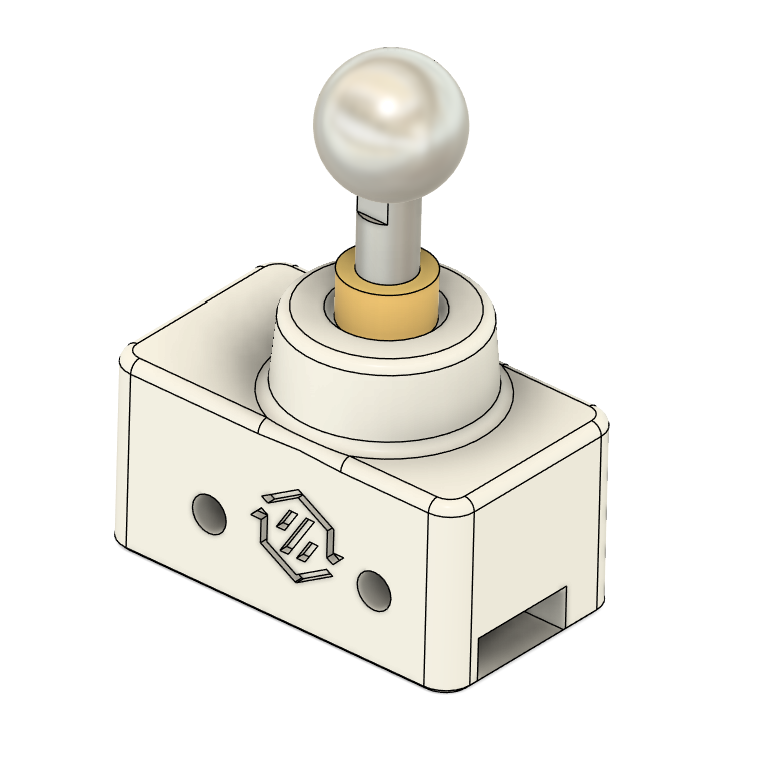
¶ Sexball Probe
The sexball probe is a tool alignment probe based on the sexbolt mod. The base block for the sexball probe is found here. Parts for this probe is included in the LDO Base kit.
¶ Cable Management
The Stealthchanger team has dedicated github repository set up for cable management.
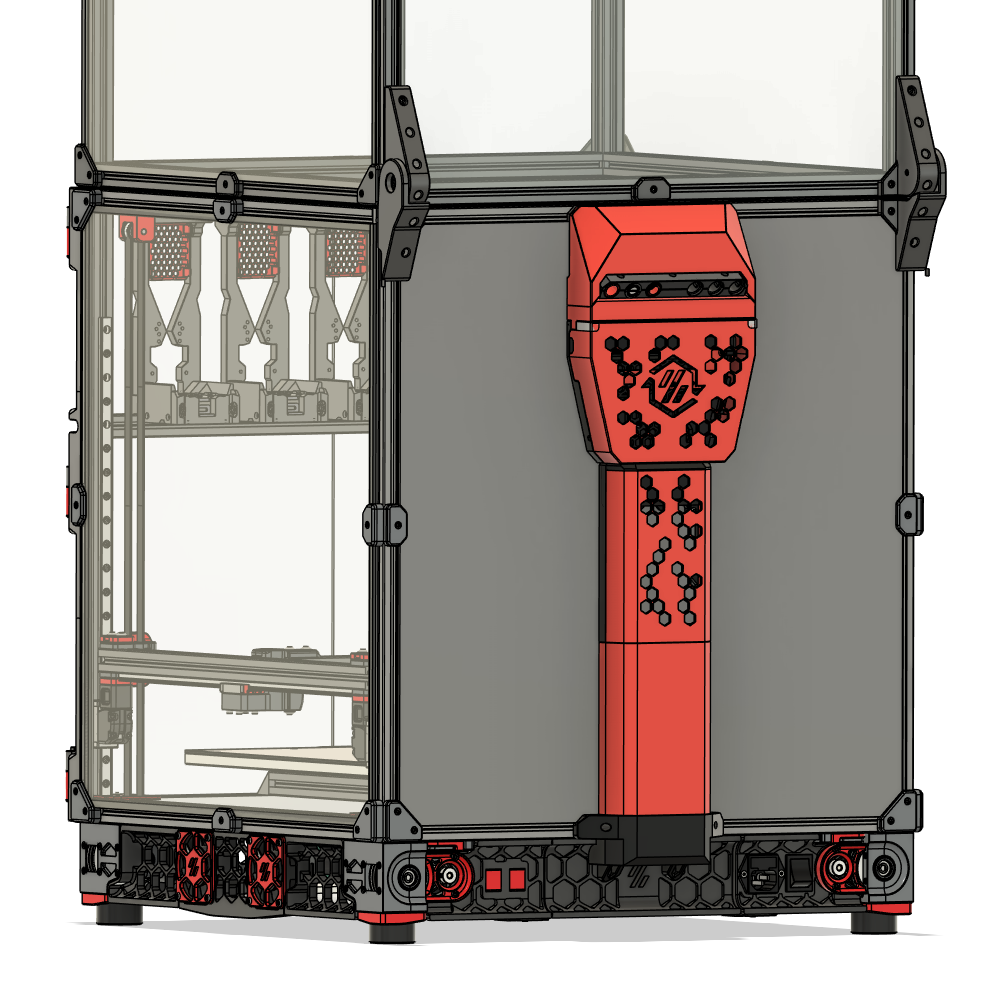
¶ Fanny Pack
Fanny Pack is a rear panel mounted electronics compartment (it replaces the stock V2.4 Exhaust Filter) that can be used to house the Nitehawk Hexa USB hub. The umbilicals start from here and enter the interior of the printer via the umbilical plate. The Stealthchanger base kit contains parts for the Fanny Pack.
¶ Umbilical Management
Stealthchanger contributer N3MI has developed an excellent umbilical management system here. The system consists of a umbilical plate and umbilical restraints.
- The Umbilical Plate replaces the stock exhaust grill to provide a stable anchor point for the umbilical cables and reverse bowden tube. A huge number of options are available for the umbilical plate , the LDO toolhead kit includes M12 cable glands for threaded umbilical plates.
- The Umbilical Restraints tame the umbilical cable by clipping a long spring steel to the umbilical cable and reverse bowden tube. 3D printed TPU clips are used to accomplish this. The LDO toolhead kit includes a run 3x0.3mm spring steel, so we recommend using the spring + 5mm cable version of the clips.
¶ Recommended Build Combo For First-time Stealthchanger Builds using LDO kit
The following is a recommended set of options for first time builders and that will give you the biggest chance of success.
- Toolhead, Anthead and Yavoth are highly recommended for Stealthchanger, they both provide excellent docking security with magnets embedded cowls and are small and compact. Hotends and Extruders are up to you. Important! Print and fit your backplates to the CNC shuttle before starting your build! The backplate the most critical part to get right.
- Modular Dock, Use the Standard Dock (non-stubby, non-short, with frame) that corresponds to your toolhead of choice. Use Spring Steel Blockers provided in the kit.
- Doorbuffer and Crossbar, Print the Door buffer of your choice and install the Crossbar in your door buffer.
- Tophat, Having a Tophat is very critical for umbilical arrangement and by extension toolchanging reliability. Build the extrusion tophat as provided by the LDO Tophat kit.
- Cable Management, Use Fanny Pack along with N3MI's Umbilical Management mod to manage your umbilicals, parts for these are provided in the LDO Base kit and Toolhead kit.